PHP extensions play a key role in how websites function by providing additional capabilities and functionality. When you use WordPress hosting, it’s important to have certain extensions installed and enabled to ensure the site operates correctly. Two such extensions are imagick and intl, which provide image processing and internationalization support respectively. In this article, we’ll look at how to install and enable these extensions on your WordPress hosting.
What are imagick and intl?
Before we begin, let’s briefly review what these extensions are.
- imagick: A PHP extension that enables image processing using the ImageMagick library. With imagick, you can perform various operations such as resizing, cropping, applying filters, and much more.
- intl: The intl extension provides internationalization functions in PHP. It allows you to format numbers, dates, and times according to different locale settings, and it supports working with various languages and cultures.
Installing and Enabling the Extensions
To install and enable the imagick and intl extensions on your WordPress hosting, follow the steps below:
Installing the imagick extension
Open the terminal or server console and run the following commands to install imagick:
sudo apt update
sudo apt install php-imagick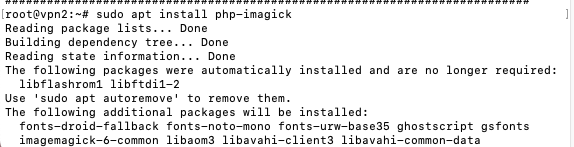
Installing the intl extension
To install the intl extension, run:
sudo apt install php-intl
You can restart the server with:
sudo systemctl restart apache2 # For Apache
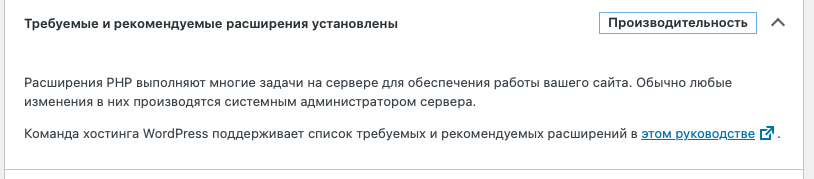
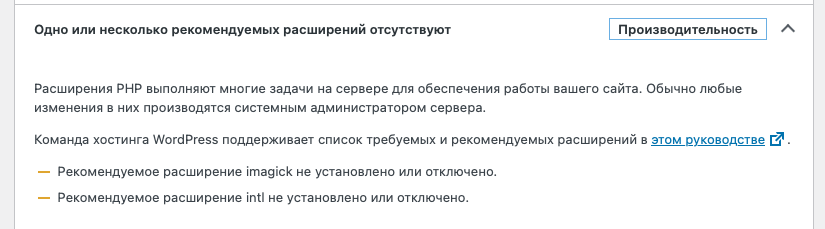
sudo systemctl restart nginx # For NginxHowever, this is usually not required. After installation, you can verify that the extensions are installed in the WordPress Site Health panel.